Welcome to
Blog Like a BossHow to Blog Like A Pro…
Module Two
Create Captivating and Shareable Content
Now that you have a clear idea of who your target audience is and what their interests are, you can start planning what kind of content you will create.
Blogging takes planning. Bloggers don’t generally just sit down each day and crank out a post. This isn’t an efficient way to work and it doesn’t produce high-quality content.
Instead, bloggers create lists of ideas that they can draw on when it’s time to write. They also often set aside special times to write. During these times, they might write a number of blog posts that they can have on hand so that when it’s time to post, they only need to publish the work they’ve already written.
Start by creating a list of topics. Taking what you know about your audience, use questions such as these to get you brainstorming topics:

- What do your readers want to know about?
- What specific questions are they asking or have they asked you?
- What problems are they facing?
- What are possible solutions to these problems?
- What things do you know that they don’t which could help them?
- What is your audience member searching for when they use Google or social media?
- What topics are your audience members actively talking about?
- What kind of content is your audience sharing or commenting on?
When you’re brainstorming ideas and topics, aim for quantity. Get as many ideas down as possible. Then, go through your list of ideas and topics, and prioritize. Put the topics that are most relevant to your readers first.
For example, a blogger who writes about living the expat lifestyle might find that her audience is interested in cuisine, learning languages, and coping with the stress of culture shock. But their biggest concerns may be how to move overseas in the first place. If this is the case, this topic should be at the top of your list.
Keep in mind as you brainstorm ideas that not all content will be text-only. You may also publish videos, infographics, podcast interviews, templates, and other types of content. (Tip: Templates perform particularly well.)
Creating Titles
Now, take your list of prioritized ideas and give each a title. Titles are very important in blogging. For online content, capturing the attention of casual web surfers and turning them into readers is a challenge for writers. People skim through titles looking for content to read. For this reason, your title needs to be catchy and clear about what the article is about.
Turn each of your topics into a working title, which is a more specific version (and as a “working” title, it can be changed after you finish writing the post, in case your writing changes course or you think of something better). For example, your topic might be something like “work-life balance for healthy families.” You can turn this into “3 Easy Changes That Will Add 30 Minutes of Family Time Back to Your Day.” You can see how the latter is catchier and more specific. If you find that you have a fourth to add, you can fix the title later.
In addition to being catchy, your titles should also be specific. As the previous example demonstrates, the article isn’t just a couple of tips on work-life balance. It has three tips that are easy and they help you gain back as much as 30 minutes. It helps to use numbers in your titles because it makes it clearer to the reader. Rather than just saying that these work-life balance tips will save you time, they will gain you 30 minutes. The reason for this is that it creates a clear image in the reader’s mind. They can easily imagine 30 more minutes of family time.
Another way to make titles clear is to include the format if it’s something other than a simple text-based article. If your post includes a video, infographic, or template, put it in brackets after the title like this:
“3 Easy Changes That Will Add 30 Minutes of Family Time Back to Your Day [Infographic].”
Once you have titles, the next step is to create sub-headings. Sub-headings are used to break up your posts and make them more skim-able. Each section should be a paragraph or a few paragraphs. In the example above, you’ll have 3 sub-headings since you’re sharing three changes.
Other Tips for Titles
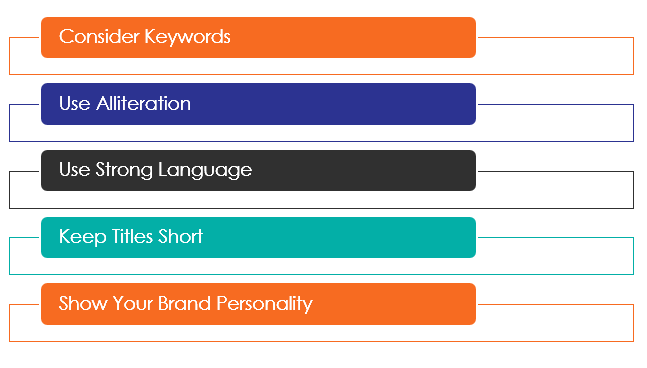
Consider Keywords. Your potential readers might be finding your blog through search engines, so try to use keywords they might be searching for. For example, “work-life balance” is a keyword. Try to put your keywords as close to the beginning of the article as possible. This makes it more likely they’ll be found.
Use Alliteration. Alliteration means using the same letters or sounds. An example of alliteration might be: “How to Cut Your Closet Clutter.” The repeated “C” sound makes the title catchier. In the example above, there is the “th” sound in “30,” “these,” and “three.”
Use Strong Language (But in Moderation). Your title should make bold claims about what the article delivers. For example, you can save the reader 30 minutes of time each day. Use action words and adjectives to make your titles stand out. But two words of caution: First, make sure that your article actually delivers what the title says it will. Otherwise, your content will look like clickbait (something you’re just trying to get people to click on). Second, don’t overuse the same word repeatedly. For example, if you use “brilliant” in every title, this will lead to readers ignoring your claims of brilliance.
Keep Titles Short. Try to make your titles as short as possible without losing the impact. Try to trim it down to under 70 characters. Data from Twitter has shown that headlines between 8 and 12 words get the most shares. On Facebook, the number is 12 to 14.
Show Your Brand Personality. Choose words, phrases and grammar that reflect your brand personality. Make sure your titles are consistent with your other written content.
Writing Your Blog Posts
Post Length
Looking again at your reader profile, determine what length your posts should be. This varies from topic to topic, and from audience to audience. Some audiences consume longer, more in-depth content, while others prefer it to be short. Decide on a length that works for you as well.
If you have a topic that is too long or in-depth, you can break it up into two posts. You can take a large topic and create a series out of it (blog series are popular and they keep your audience coming back for more).
On the other hand, if your topic is too brief, you can add to it or make it part of another post. Of course, post length doesn’t need to be exactly the same each time. You can vary it sometimes, writing an unusually long one sometimes or a quick one when it’s more convenient. But it’s good to aim for some consistency. As you monitor your blog performance, you’ll better find a “sweet spot” for article length.
Write Like a Journalist
When learning about English composition in school, we’re taught to start with a basic foundation and then build our argument from there, expanding on points as we go. The opposite approach works best in blogging.
This approach is called the “inverted pyramid” style because it starts with the conclusion, and then fills in the details in the body of the text. This is done in order to gain the reader’s attention and offers a sort of teaser at the beginning to make the reader want to find out more.
For example, a journalist might tell the story of a court case by saying, “The judge banged her gavel and the case was concluded – The defendant was guilty.” This is likely to make the reader wonder what happened, what the defendant did, and how they lost the case. All of this is in the body of the article. This is much more effective than starting at the beginning of the story.
Break Up Your Text
You’ve probably noticed that blogs rarely have huge blocks of text, like a book or newspaper. Text is broken up to make online content more readable on a variety of devices.
There are several ways to do this including:

- Short paragraphs. Each paragraph should have one main idea and no more than 3 or 4 sentences.
- Line breaks. Leave ample blank space between paragraphs to make your blog more readable.
- You can add images to your posts not only to break up the text but to make them more visually appealing.
- Bulleted lists. The bulleted list you’re reading right now is easier to read and take in than if it were written in paragraph form.
- Bold and alternative fonts. When you have something you’d like to stand out from the other text, make it bold, or a different font. But use this sparingly as too much can make your text harder to read.
- Blank space. Design your blog or choose a template that offers plenty of blank space.
Links and Networking
Wherever appropriate add links to your posts. For example, if you cite another article or discuss another website or blog, turn a word or a few words into a link. You can also link to your own content if you refer back to another post. For example, “Last week, I wrote about a networking event that is coming up…”
Another place to add links is where you mention another blogger. This can have networking advantages. When you mention another blogger and link to them, it’s good to let them know you did and why. However, don’t push them for a reply, a share, a comment, or reciprocation. That will happen naturally.
Editing Your Work
Blogs are written in a friendly tone of voice, like a person you know sending you an email. But this doesn’t mean you can let grammar mistakes or misspellings slide. You don’t have to do the same type of careful proofreading that editors do for print material, but you need to make sure it’s mistake-free and written in the best way possible.
Here are some easy ways to edit and improve your work:

- Always read over your work. It’s not enough to just run it through spellcheck. Spellcheck misses things that only the human eye can catch. Before you publish, read through your post and watch out for mistakes.
- Read your work aloud. This is a good way to see how natural your writing sounds. Your ear may catch something your eyes didn’t.
- Sleep on it and read it again. For bloggers who are very concerned about the quality of their work, or are blogging on delicate or very important topics, they really need to nail what they’re trying to say. Sometimes, it’s best to edit with fresh eyes by setting the finished work aside and coming back to it later.
- Ask a friend to review it. Another person might catch something you don’t, and some of us, naturally, are not great editors of our own work. You probably won’t want to ask someone to review every post, but try it out for your ‘epic’ or longer ones.
Activity:
- Generate Blog Post Topics
- Step 1: Start by brainstorming topics
- Step 2: Prioritize your topics and select 1-2 to work on
- Step 3: Turn your topics into catchy titles
- Step 4: Create your subtopics to help you organize your blog post
- Use the tips in this module to draft your blog post in a separate document or notepad (wherever you write your posts). You can also try rewriting a past blog post as a way to test the new strategies in this module.
Discover Your Superpowers
Plain and simply put, you are unstoppable! The guides below are your blueprint to earning your cape and reaching your true potential.
In spite of how many times you’ve thought or even said out loud, “I’m only human,” Discover Your Superpowers: The Key to Unlocking Your True Potential will forever change the meaning of that phrase. Discovering or igniting your dormant superpowers will allow you to live your best life, and this book is just the resource you need to achieve it. Enclosed are tools, strategies and experiences shared by author Tamara Paul that will enable you to discover the superhero within, allowing you to take a quantum leap in multiple areas of your life.
Our superpower is making you a superhero.